Thursday 20 October 2011
Wrapture is live and open for business!
Quite exciting!
www.wrapture.eu
Sunday 9 October 2011
Wrapture goes live!
At the London pen show last week I sold 12 wraps, took an order for 1 and sold various small single pen wraps. All in all a success! Onwards and upwards. Here's the link to the website:
www.wrapture.eu
Tuesday 27 September 2011
Pen wrap tutorial
Step 2 - after carefully ironing the fabric next comes cutting out. It is worth taking your time with this step. If the fabric is neatly cut then the following stages are much easier. You need an inner and outer fabric of the same sizes (about 19 x 11 inches or thereabouts), plus fabric for the pen slots (about 13 x 7 inches)

Step 3. Take the piece of fabric you will be using to form the pen slots. Fold over about 0.5 to 0.75 cm and iron this flat. Then sew two parallel lines to secure the top edge. Sometimes I add cotton webbing to reinforce this, depending on the fabric. The pen clips will be pushed over this so it needs to be strong enough to take a bit of wear.

Step 4. Turn the pen slot fabric over to the wrong side with the edge you have just sewn to the top. You now need to fold over the right hand edge and iron this flat.

Noticing that I have subtly changed pen wraps mid way through, we move on to step 5.
Step 5 - the left hand edge of the pen slot needs to be sewn onto the inner fabric. Line up the bottom edges of the two fabrics, allowing a more or less equal amount of fabric either side of the slots. The main body of the fabric is wider than the pen slots to allow the fabric to fold over the pens, thus giving them some protection.

Step 6 - Even in the process of making these wraps I have amended my process slightly. I now sew in the wadding at this stage, sewing it onto the inner fabric, beneath where the pen slots will sit. Once the pen slots are sewn on you will not see this line of sewing.
Step 7 - The pen slots. This is a bit fiddly. I have tried a couple of different methods - you will need to experiment and see which you prefer. Now I use pins placed so they line up with the lines of sewing. This takes time to place them reasonably accurately. The downside is you need to pull them out as you sew which can mean a bit of stopping and starting. I have tried using thin paper with printed lines. This is quick at this stage and is very accurate (providing you do sew along the lines!), but it is fiddly after removing the paper. Maybe I just never found the right paper but I found myself spending ages pulling out tiny scraps of paper stuck under the thread.

Step 8 - take a break, eat some biscuits, you need your energy.

Step 9 - sew the pen slot lines very very carefully, especially if the sewing thread shows up really clearly, or the fabric has clear lines in the pattern.


Step 10 - attach the wrapping cord by sewing this to the right hand side of the inner fabric.

Step 11 - pin the layers together and shape the two top corners. I am sure that many sewers of a classical disposition will turn pale and faint but I just pin stuff together and sew. I rarely go for all of that tacking malarky. It was probably my upbringing. So, the inner and outer fabrics need to be placed back to back (checking things are the correct way round if you have a specific pattern) and if the wadding is not yet on then this needs to go into the pile too. I used to used wadding the same size as the whole outer fabric but now I use it the same width but only to the height of the pen slots.

Step 12 - If you want curved corners I find now is the best moment to cut them as you can get them more accurate. So everything is pinned, you have made sure the wrapping cord is tucked out of the way and won't get sewn into a seam by mistake, and we are ready for nearly the last bit of stitching.

Step 13 - sewn nearly all the way round leaving a gap so you can turn it all the right way round and finish off.

Step 14 - turn the right way round, carefully pushing out the corners and press. This gives you a chance to ease the fabric into the right positions for the final seam round the edge - i.e so that you don't have a huge piece of the inner fabric showing over the top of the outer.
Step 15 - sew a final seam all around the wrap. This gives it a bit of extra strength and makes it all nice and neat.

Step 16 - feel darned proud of yourself!


Saturday 25 June 2011
Wrapture

I am in the process of setting up a website and on-line shop, and hopefully I will be able to put up another post soon-ish with an actual link to the new website.
Here's how it all came about: My husband collects fountain pens and there are a fair number of other people out there who do the same thing. So a couple of Christmas's ago I decided that for one of his presents I would make him a pen wrap to store a few of his pens. He liked it (as every well behaved husband would!) and put a picture of it on the Fountain Pen Network (where people talk a lot about pens), and it received some favourable comments. The Fountain Pen Network holds 4 or 5 pen shows round the country through the year, and I made a number of wraps and took them to the Bristol Pen Show and just last weekend to the Lichfield Pen Show. Both were fascinating learning experiences. Although for various reasons the Bristol show was very quiet with few people attending I sold about 7 or 8 wraps. By contrast Lichfield was busier but I only sold 2 wraps. The next show I am going to is the London one which is in September.
Anyway, enough of that, here are a few pictures of some of the wraps:


Wednesday 11 May 2011
Race for Life
http://www.raceforlifesponsorme.org/kathrynforster2111
Sunday 8 May 2011
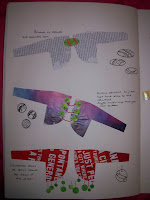
Designing an accessory - initial process


Then, as there has been a considerable gap since I worked on this module, I decided to work from some of the original images and do some fresh paper exercises:
Drawings 3 & 4


Drawings 5 & 6


Drawings 7 & 8


Drawings 9 & 10


Drawings 11, 12 & 13


Then I used cut out windows to audition potential designs. Here is a selection of some of them:
Drawings 14 & 15


Drawings 16 & 17


Drawings 18 & 19


Finally, I prepared some small mock-ups of how possible shapes/sizes of brooch/button could sit on the garment:
Drawings 20 & 21

Sunday 16 May 2010
Buttons and beads
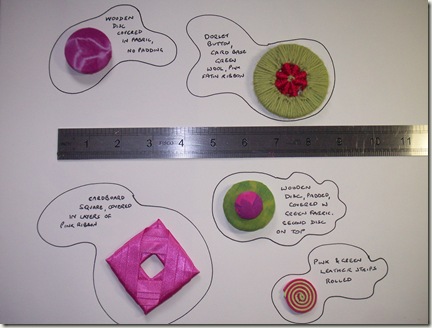
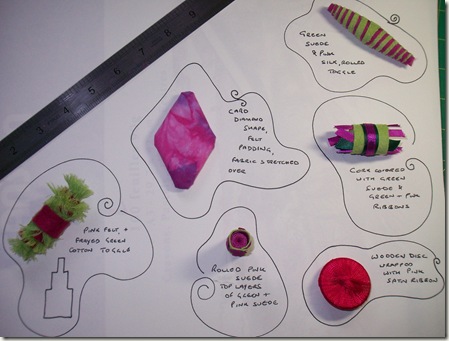
I decided not to tarry too long on the world of tassel making. I cracked on and made some buttons:
I was not really drawn to Dorset buttons, but I made one just to show willing. I don’t think I will make any more.
Rolling up bits of felt and suede was more satisfying though. I had forgotten just how long it takes to fray a piece of material – I like the effect but is it really worth all the time it takes? Hmmm … not sure. The diamond shape made from card and covered with material needs to be done a bit differently next time to avoid the obvious points created from the way the material was folded over. Also, if I wrap a wooden disk in the future I will do a couple of things differently. First I think I would either paint the disk or wrap it in fabric of the same colour. It is easy to accidentally move part of the ribbon out of place and then you are left with an obvious gap. Secondly maybe I would possibly go round twice – not sure whether that would be better not, perhaps not on second thoughts. Other than that I think they worked out quite well.
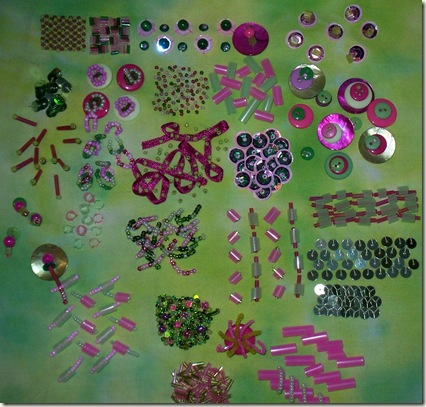
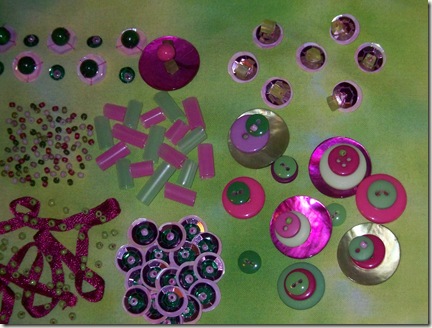
Then I spent a lot of time and got a lot of pleasure out of working on the bead sampler. I could have kept going for ages longer but decided it might be prudent to stop. The picture below gives an overview of the whole thing:
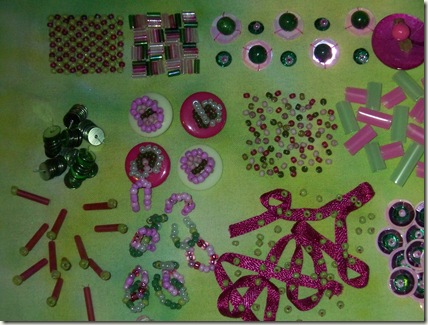
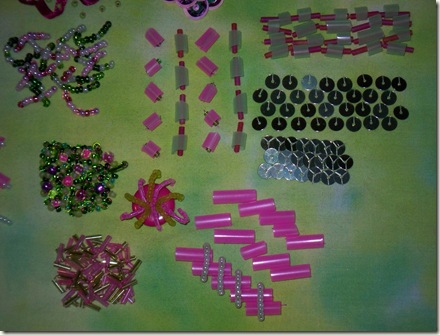
Here are close ups:
Picture one above: There are some fairly standard squares of seed beads and bugle beads, seed beads dotted randomly and sequins topped with round beads. The shiny tubes mid right are sections of straws. I am fond of the dark pink bugle beads topped with green seed beads to the bottom left – you can’t quit tell it from this angle but they are standing up and move as the cloth moves.
Picture two above: I rather like the piles of buttons as they move and change position as they are only secured through one hole. The only thing I would change is I would replace the small beads I have used to top them off with much bigger ones.
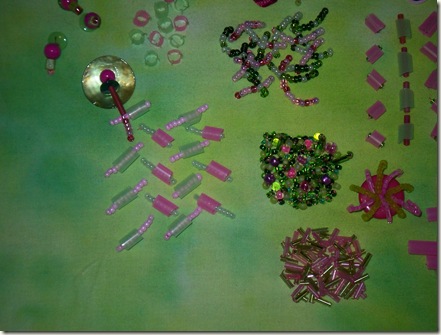
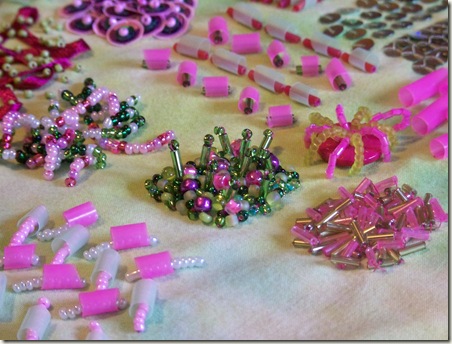
Picture three above: I hate the pink straws and green ‘pearls’ in the bottom right! However, I do like the horizontal bugle beads inside green straws in the top right. I also really like the effect of the bottom left and mid left ‘heaps’. The final picture below shows them much more effectively. The bugle beads are piled up like a heap of firewood.
Picture four above: There are some straws end on, and to their left some buttons with strings of beads extruding out.
